LED and Switch interfacing with Arduino
In this tutorial we will learn how to interface a LED and a switch with Arduino.
We will make a LED blink application (the Arduino equivalent of ‘Hello World’) and would make a LED switch on and off using a micro dip switch/button.
Components:
- Arduino UNO R3
- Breadboard
- 5mm LED
- Resistors – 220E & 1K
- Micro Switch
- Connecting Wires
First we will connect the anode (+ve longer pin) of LED to pin no 13 of Arduino and cathode (-ve shorter pin) to GND through a 220 ohm resistor as shown in the diagram below.
The resistor is used to limit the current from Arduino digital output pin. The on-board LED on pin no 13 of Arduino can also be used for this tutorial.
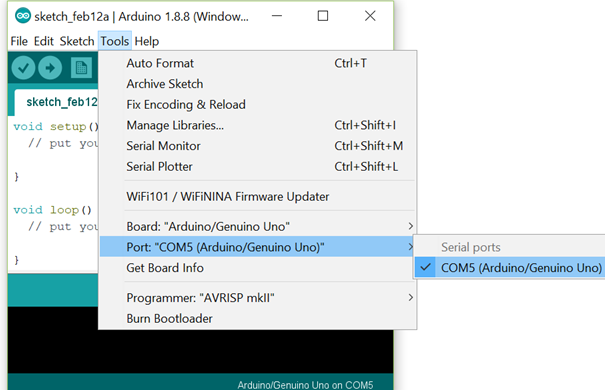
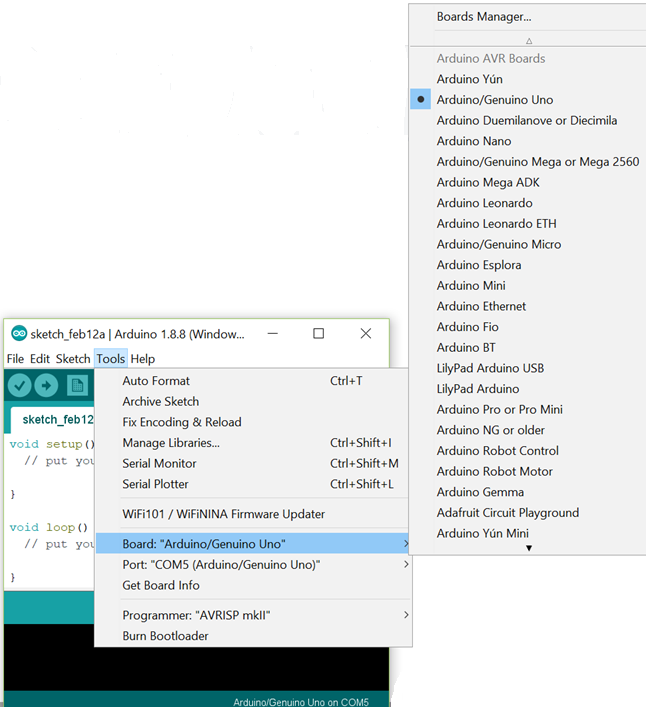
Once the connections are done connect the Arduino board to your computer and open Arduino IDE. Select the Board as Arduino UNO and COM Port.
Copy and paste the following sketch into the editor and click upload.
void setup() {pinMode(13,OUTPUT); \\declare pin13 as Output}void loop() {digitalWrite(13,HIGH); \\Write High on pin 13delay(1000); \\delay of 1 seconddigitalWrite(13,LOW); \\Write Low on pin 13delay(1000); \\delay of 1 second}
If everything goes fine then your LED should blink with 1 second ON and OFF time.
Now we will add one switch in the circuit to make the LED on and off.
Do the wiring of switch as per the given diagram.
Connect one pin to the +5V and other non-shorted pin to GND via a 1K resistor.
Whenever the switch is pressed it will make the input HIGH and the same will be read on the input pin of Arduino.
Now copy and paste the following sketch to editor and upload.
int inPin = 7; // the number of the input pinint outPin = 13; // the number of the output pinint state = HIGH; // the current state of the output pinint reading; // the current reading from the input pinint previous = LOW; // the previous reading from the input pin// the follow variables are long's because the time, measured in miliseconds,// will quickly become a bigger number than can be stored in an int.long time = 0; // the last time the output pin was toggledlong debounce = 200; // the debounce time, increase if the output flickersvoid setup(){pinMode(inPin, INPUT);pinMode(outPin, OUTPUT);}void loop(){reading = digitalRead(inPin);// if the input just went from LOW and HIGH and we've waited long enough// to ignore any noise on the circuit, toggle the output pin and remember// the timeif (reading == HIGH && previous == LOW && millis() - time > debounce) {if (state == HIGH)state = LOW;elsestate = HIGH;time = millis();}digitalWrite(outPin, state);previous = reading;}
You can now control your LED on and off by pressing the switch.
No comments yet. Login to start a new discussion Start a new discussion